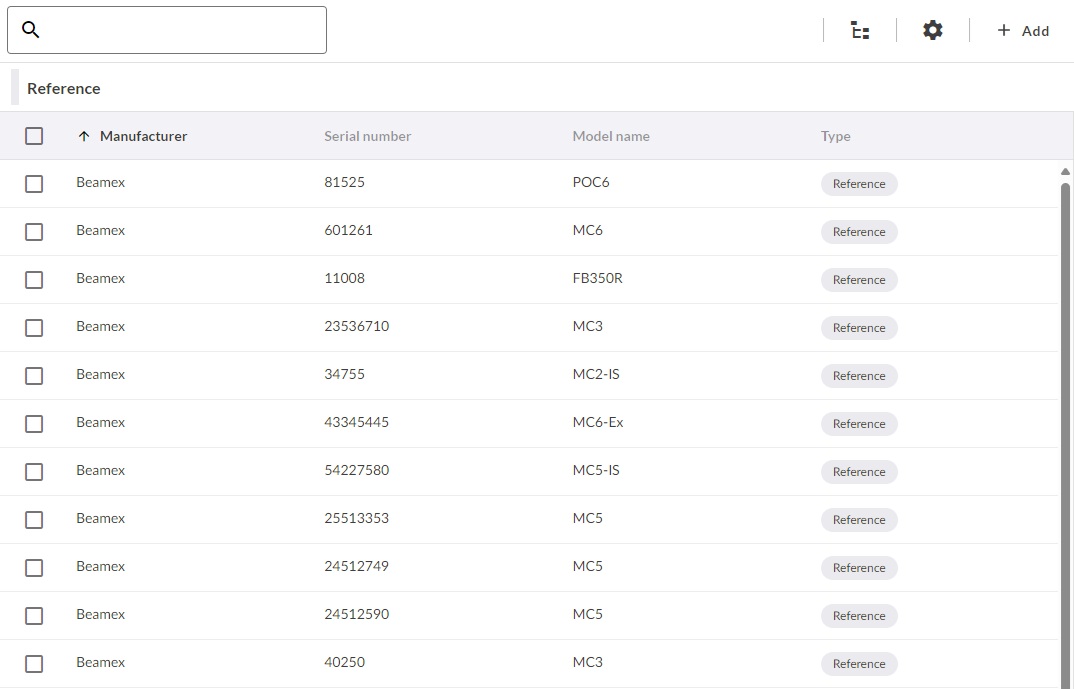
References view
This is the view where the references are maintained. The view shows following data: Manufacturer, model, serial number and due date.
Manage references
Add a new reference or reference sensor
A new reference or reference sensor is added by clicking .

Reference model
Select the reference model from the list that opens up. You can search for an existing manufacturer or model by typing into the search field or by scrolling through the pages. Alternatively, you can create a new model and select it instead.
| Selection | User is presented with models defined in list view as |
|---|---|
| Add sensor | Custom RTD sensors |
| Add calibrator | Show in references |
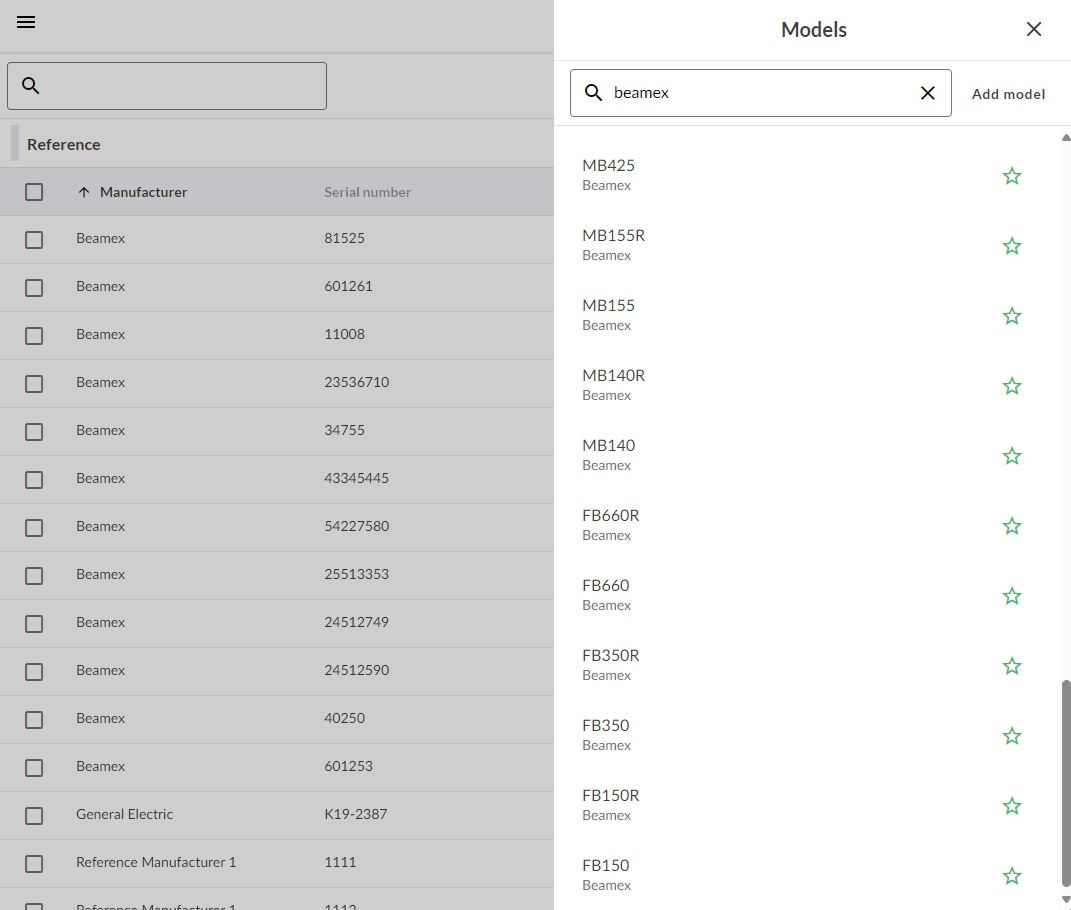
If you can't find the correct model, a new one can be created by clicking + Add model-button at the corner of the sidebar. This will take you to model creation sidebar, where the missing manufacturer and model can be added. After creating a new model this way, you return to the previous model selection view.
Note!
When creating the new model, just remember to mark the model to be visible in the reference models-list by enabling Show in references and enable Custom RTD sensor if you are creating such model. This allows you to enter the sensor specific coefficients (Cvd or ITS-90) when creating a sensor.
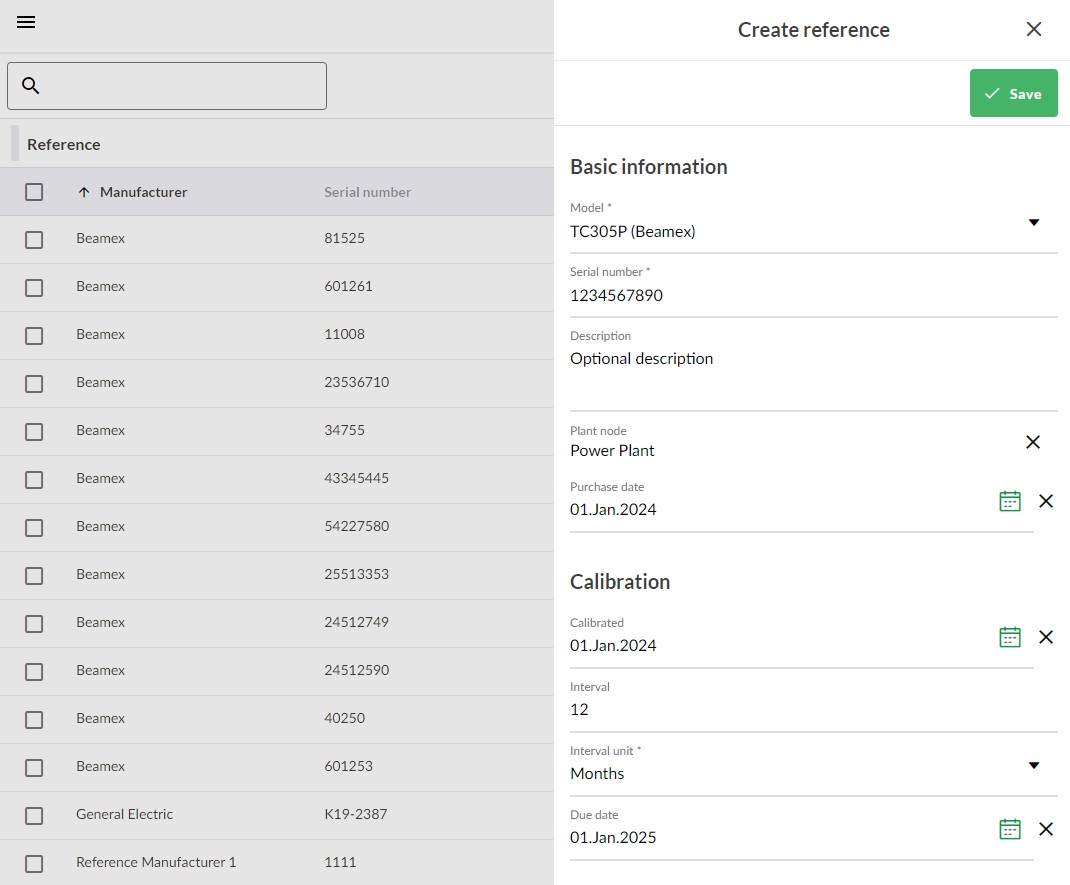
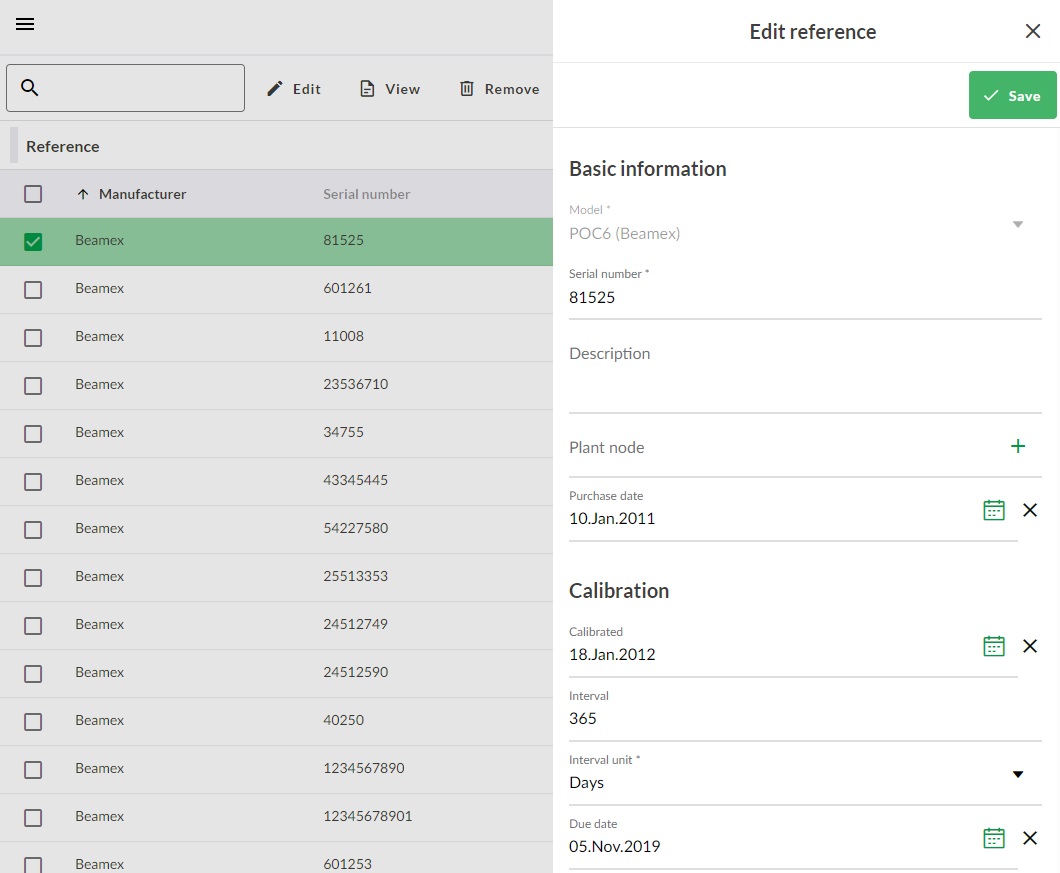
Add details of your reference
After the Reference Model has been selected, the details for that specific reference need to be added to make your reference is unique.
- Serial number (Required)
- Plant node
- Purchase date
- Calibration details
- Calibrated date
- Calibration interval
By assigning a reference to a specific plant node, it is possible to use site-based access control to manage access. See Site-based access control for more information.
By providing the reference's calibration details, you can also manage your references' calibrations. The dashboard informs you of the reference's approaching calibrations.
Note!
Supported Beamex calibrators are the masters of their own data (e.g. S/N, calibration date). When syncing with the calibrator, the information user has entered is updated with the data from the calibrator.
Add sensor coefficients
In addition to the details given for a reference, sensors require further details about the sensor coefficients. Supporting calibrators, such as Beamex MC6 family calibrators are able to use these sensor coefficients when using the sensor when calibrating temperature instruments, that have been defined to use custom RTD sensors in the input.
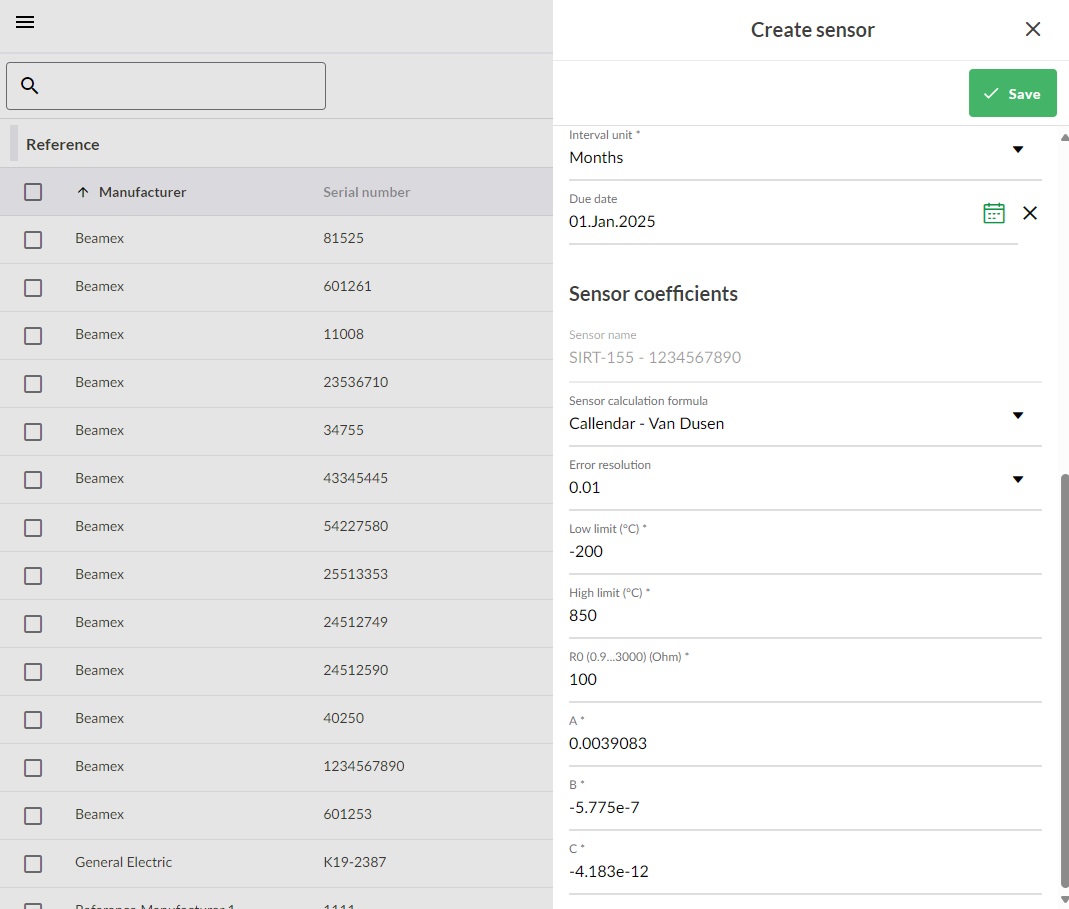
Select the Calculation formula and fill out required information from following supported formulas:
- ITS-90
- Callendar-van Dusen
- Factor
Note!
These sensors MUST always be used with their individual coefficients. The sensor coefficients for Beamex RPRT, IPRT or SIRT can be found from the sensor's calibration certificate.
The sensor coefficients for your Beamex temperature sensors (RPRT, IPRT and SIRT) can be found from their respective calibration certificates.
See here how to create a temperature instrument that uses sensor with coefficients. Also, calibration results show the sensor coefficients of the reference sensor used in a calibration, performed with Beamex MC6 family calibrator.
Maintaining custom RTD sensor coefficients
Each time a custom RTD sensor is re-calibrated, the sensor coefficients will change. Remember to update the coefficients when receiving the sensor back from re-calibration!
Callendar - van Dusen
Supported by all calibrators that communicate with LOGiCAL
| Field | Description |
|---|---|
| Low & high limits | Defines the temperature range in which the custom sensor is used. |
| R0 | The custom sensor's resistance in Ohms at 0 °C. |
| A, B & C | Factors that customize the user defined temperature sensor. |
| Resolution | The resolution of the custom sensor |
ITS-90
Supported by MC6 family calibrators.
| Field | Description |
|---|---|
| Low & high limits | Defines the temperature range in which the custom sensor is used. |
| Rptw | The custom sensor's resistance in Ohms at 0 °C. |
| Deviation below zero | Select the range/calibration point data from the available options. |
| A & B | Factors that customize the user defined temperature sensor below zero temperatures. |
| Deviation formula | Select the range/calibration point data from the available options. |
| A,(B, C & D) | factors that customize the user defined temperature sensor. The amount of factors depends on the selected Deviation Formula |
| Resolution | The resolution of the custom sensor |
Factor
Supported by MC6 family calibrators.
| Field | Description |
|---|---|
| Factor | A factor that offsets the standard temperature curve selected in Sensor Type. |
| Sensor Type | Select a standard Sensor Type. A simple way of doing it is taking a standard RTD sensor with a 1 ohm resistance @ 0 °C, e.g. Pt1. Then enter the real resistance @ 0 °C as the Factor. |
| Resolution | The resolution of the custom sensor. |
Edit references
Start by selecting a reference and click to begin editing.
Delete references
Start by selecting a reference and click to delete it.
Manage certificates
Add certificate(s) to your reference
After the reference details have been added, you can add one or more calibration certificates for this reference. To do this, start by selecting a reference and clicking View calibration certificates.
The calibration certificates sidebar lists all the uploaded certificates. If you click on the certificate number, details regarding this certificate, like the filename and when certificate are saved, are shown.
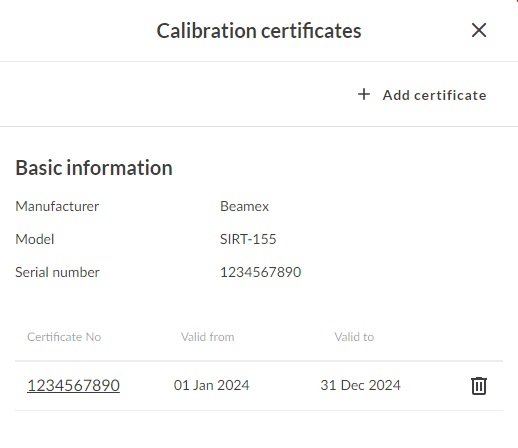
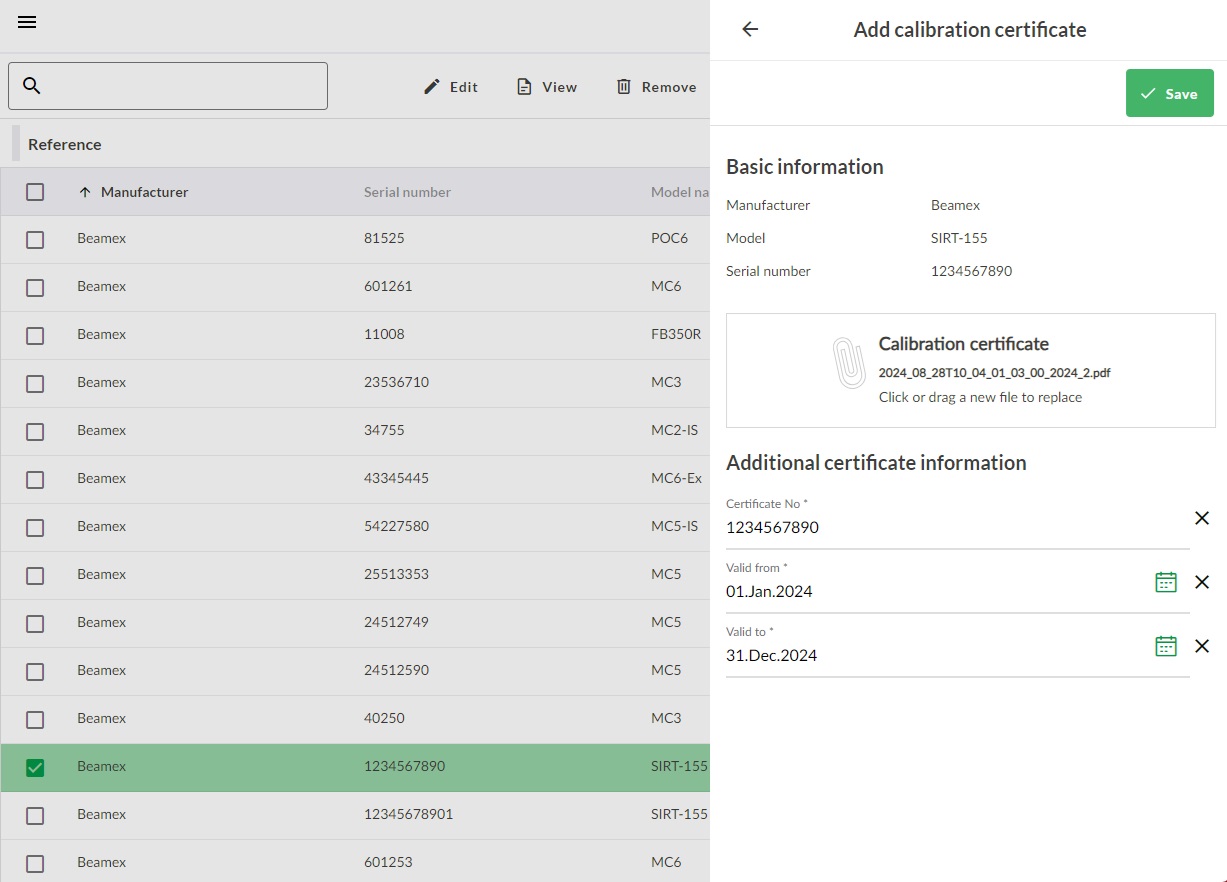
To add a new certificate, click + Add certificate.
You can drag and drop new certificates or select a file from your computer.
Edit certificates
Editing certificates directly is not possible, but they can be reuploaded. To do this, see above.
Delete certificates
From the certificates view and click to remove a certificate.
Add a Beamex communicating calibrator using Beamex Sync
When connecting your calibrator with LOGiCAL via Beamex Sync for the first time, the calibrator is added to the Calibrators database. Also all calibrator's module information is stored and are usable when selecting references in bMobile.
Note!
External controllers and EXT sensors do not appear automatically as references. They need to be added manually.