Checkout
Checkout an instrument for calibration:
Checkout is a combination of tasks performed for an instrument when it is assigned for calibration, such as:
- What device is going to be used to document/calibrate the instrument
- How the selected device can be best used to perform the calibration task
- Who is going to perform the work
Checkout can be initiated from following views:
- Function-procedure view, top left corner
- Manage work view
Once you have clicked Checkout, a side bar opens up to the right side of the screen:
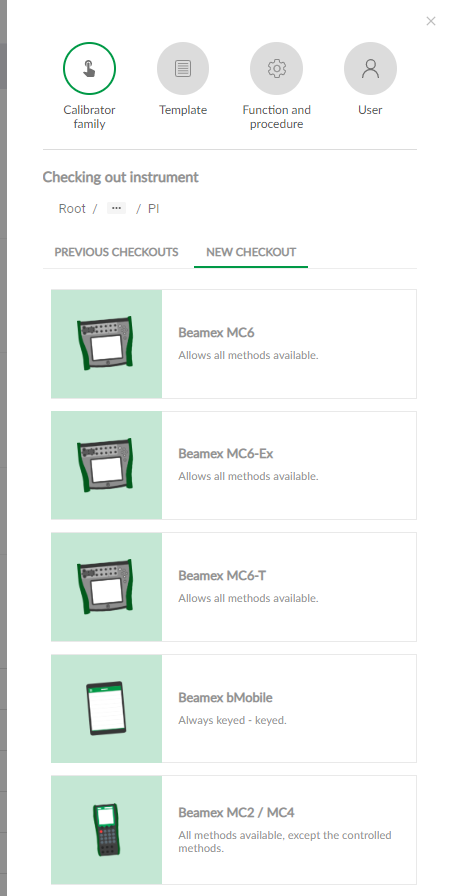
The top part of the checkout view shows you in which step of the checkout you are. The amount of steps required depend on the selections made. Below the step indicator is the selected step's details.
Step buttons
| Step button | Description |
|---|---|
| Step icon for calibrator family selection. The filled grey background indicates that item can not be clicked. | |
| Step icon for template selection. The grey circle indicates that item can be clicked and step is possible to edit. | |
| Step icon for function and procedure parameters. The green circle indicates that the item is the current selected item. | |
| Step icon for user assignments. The filled grey background indicates that item can not be clicked. |
Calibrator family -tab
1. Has the instrument been calibrated before in LOGiCAL?
- Previous checkouts: You can skip many steps by using the same settings used in previous calibration
- New checkouts: Select this if there are no previous calibrations done for the instrument (in LOGiCAL).
2. Select the mobile device
Now select the mobile device you plan to be used to document / calibrate the instrument with. See Supported mobile devices for more information about each device and their capabilities.
Following steps depend on the selected device.
- If you select bMobile, you jump directly to the User -tab, as bMobile does not require additional information for the calibration.
- If you select any of the calibrators listed, you are directed to the next step.
Note!
The device selected here should be used to execute the calibration with. You are able to sync the instrument to a different device than you select here, but the configuration is done specifically for the device chosen here. This means that the checkout configuration is not suitable for a different device.
Template -tab
LOGiCAL has some built in templates, that simplify the checkout process by populating some of the fields with pre-defined values. The template list is filtered based on:
- the selected calibrator and
- Configuration of the instrument to be calibrated.
Below picture shows the available templates for pressure transmitter function checkout.
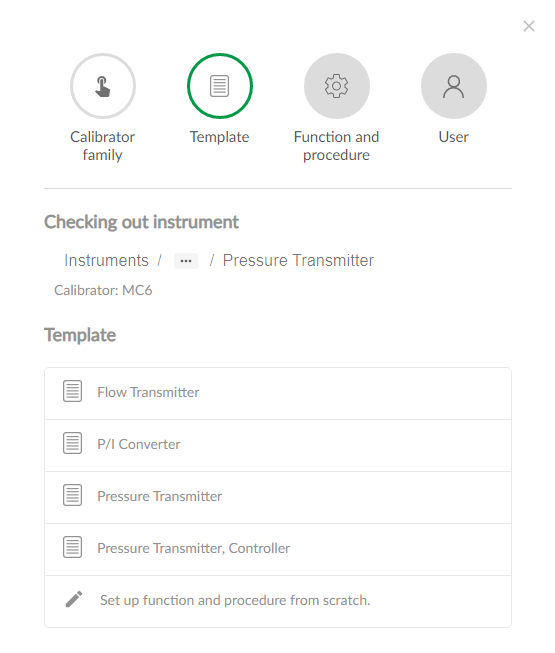
If none of the templates feel suitable for your instrument, the calibration method can be set up manually by clicking Set up function and procedure from scratch.
Function and procedure -tab
In this step you define how the calibration is going to be performed, i.e. what calibrator's functionalities (e.g. measurements) are going to be used to perform the calibration.
The Function and procedure tab two sub-tabs:
Function sub-tab:
This sub-tab contains fields specific to the instrument to be calibrated. The fields are required to instruct the selected calibrator to know what to do with the instrument (i.e. how calibration is going to be performed): Some basic information about the instrument's function (such as Input and output quantities and ranges) is presented in this view to help you out.
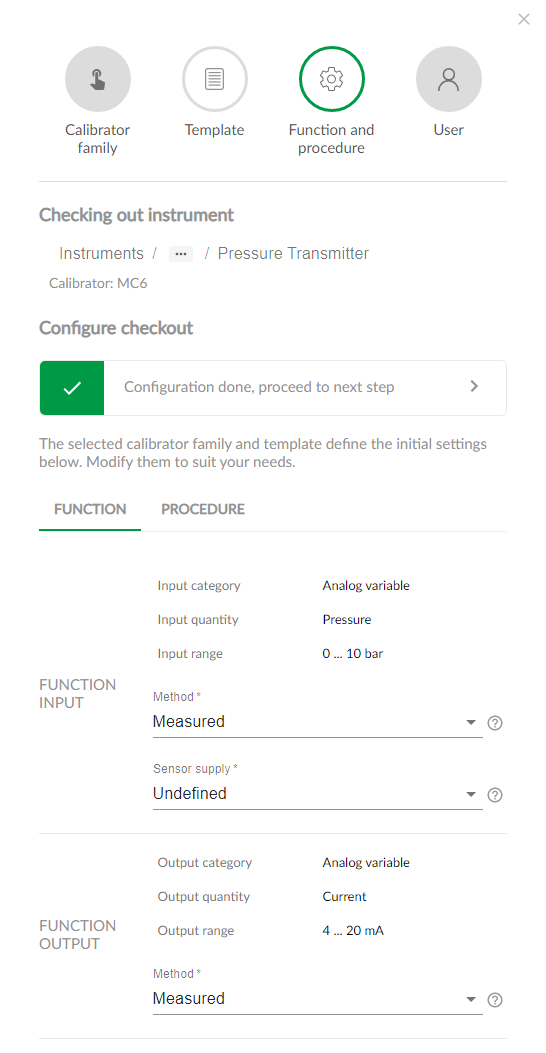
The function tab is divided into input and output sections.
Method is a field which is always required and it is used to define how the input or output is realized.
For full list of fields, see Description of fields
Procedure sub-tab
The procedure sub-tab contains conditions for the calibration points' acceptance and also whether the instrument's output signal needs some kind of supply voltage or current provided by the calibrator and the calibrator requires this setting for providing a supply voltage.
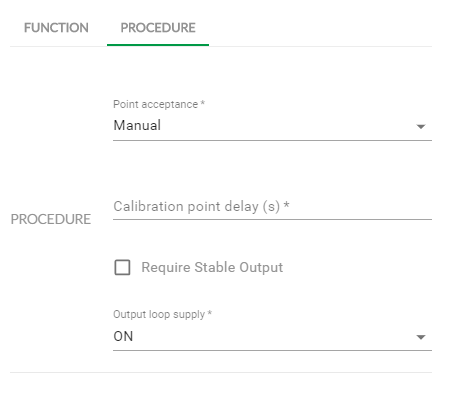
For full list of fields, see Description of fields
The visibility of this field and the availability of options depend on current function.
When you are ready, click on the Configuration done, proceed to next step.
User tab
This step is used to select the user whom the work is to be assigned. You can select a user from the list of users. If you plan to perform the task yourself, a quick link, Assign to me is provided above the user list. The last step is to click the Checkout.
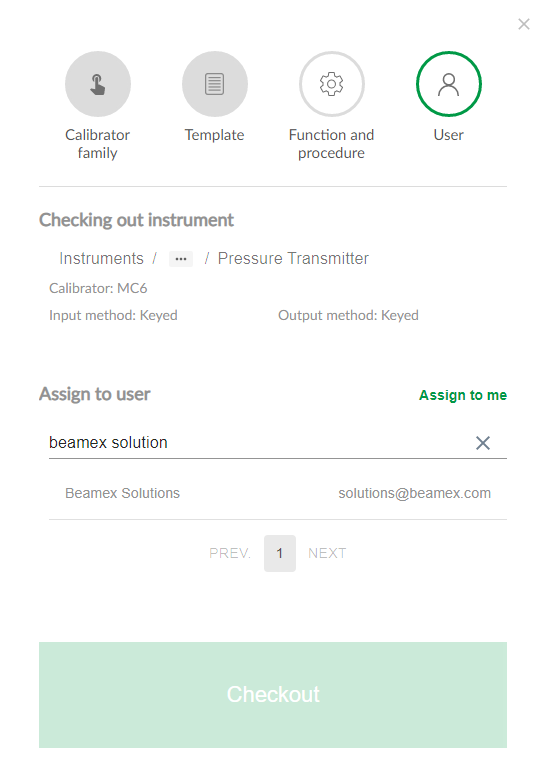
About instrument which is checked out
A checked out instrument can be synced to a compatible calibrator or to bMobile. See how to sync with:
See also:
Check out examples
See checkout example for